How to Use Ammonia-Free Glass Cleaner Safely on My Car
Many car owners want crystal-clear windows but struggle with streaks, harsh chemicals, or damaging cleaners. You’re not alone—finding a safe, effective way to clean your car’s glass can be tricky. Luckily, ammonia-free glass cleaners are a great option for a streak-free shine without the harsh fumes.
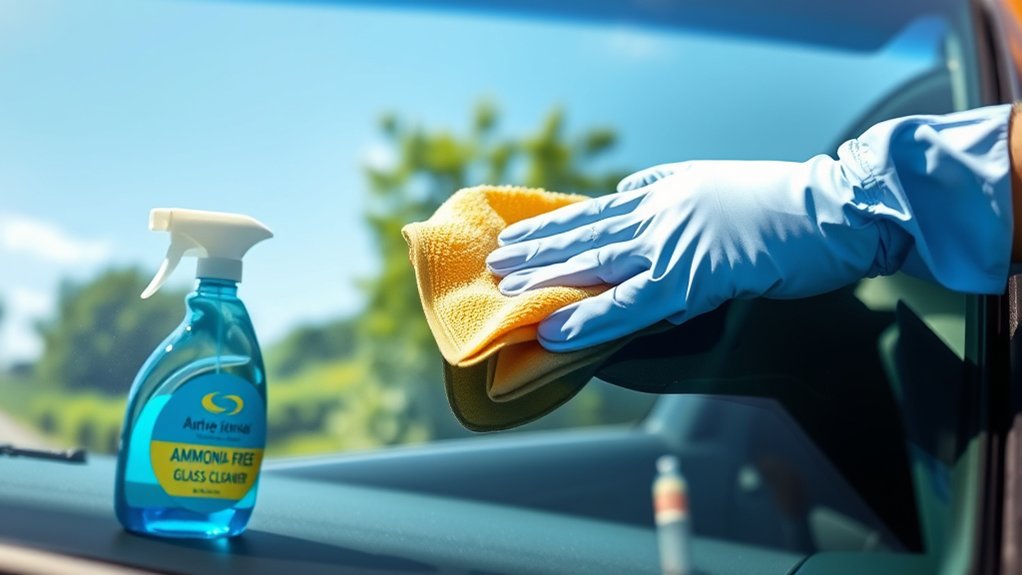
To use ammonia-free glass cleaner safely on your car, first wear gloves and safety glasses, and guarantee your car is parked in a shaded, stable area.
Spray the cleaner onto a soft microfiber cloth, not directly on the glass, and wipe in gentle, circular motions from 6-8 inches away. Dry each section thoroughly to prevent streaks.
If you want to achieve a clean, streak-free shine while protecting your surfaces, keep exploring these tips and techniques.
Key Takeaways
- Wear protective gloves and safety glasses to keep your skin and eyes safe while cleaning.
- Spray the cleaner onto a microfiber cloth instead of directly on the glass. This helps prevent oversaturation and mess.
- Try to clean in shaded areas or during cooler parts of the day. It helps avoid streaks and quick evaporation of the cleaner.
- Use gentle, circular motions with a soft microfiber cloth. This way, you won’t scratch tinted or coated glass surfaces.
- Make sure to rinse or wipe away any excess cleaner completely. This prevents smudges and residue from building up.
Why Use Ammonia-Free Glass Cleaners for Your Car?
Have you ever noticed how traditional glass cleaners with ammonia can leave streaks or cause fogging on your car’s windows? That’s because ammonia is harsh and can damage the tint or coating on your glass.
Using ammonia-free cleaners is a safer choice. They don’t contain chemicals that can harm your car’s surfaces or interior. These alternatives clean effectively without leaving residues or streaks, ensuring clear visibility.
Plus, ammonia-free cleaners are gentler on your skin and the environment. They’re designed to tackle dirt, grime, and fingerprints without the harsh fumes.
Switching to ammonia-free glass cleaners helps protect your car’s delicate coatings while giving you a streak-free, crystal-clear view. It’s a simple change that makes a big difference in maintaining your vehicle’s clarity and safety.
How to Choose the Best Ammonia-Free Glass Cleaner
Choosing the best ammonia-free glass cleaner involves considering a few key factors to guarantee you get a product that effectively cleans without damaging your car’s surfaces. First, look for a cleaner specifically labeled as ammonia-free to avoid harsh chemicals that can harm tinting or paint.
Opt for ammonia-free glass cleaners to protect your car’s surfaces and ensure safe, streak-free clarity.
Check the ingredients list for gentle, natural solvents like plant-based extracts or alcohols. Consider the product’s versatility—ideally, it should work on both glass and plastic surfaces.
Read reviews to gauge its effectiveness and ease of use. Also, choose a formula that leaves no streaks or residue, ensuring clear visibility.
Finally, opt for environmentally friendly options if possible, as these tend to be safer for your vehicle and the environment.
Preparing Your Car and Work Area Safely
Before you start cleaning, put on protective gear like gloves and safety glasses to keep yourself safe.
Make sure your work area is clear of obstacles and distractions so you can focus on the task.
Also, check the weather forecast to avoid cleaning in direct sunlight or rain, which can affect the results.
Wear Protective Gear
To guarantee your safety while cleaning your car with glass cleaner, start by wearing protective gear. Put on gloves to prevent skin irritation from any chemicals, even if they’re ammonia-free.
Safety goggles are essential to shield your eyes from splashes or spray that could cause irritation or injury. If you’re working in a confined space or expect to do a lot of cleaning, consider wearing a mask to avoid inhaling any mist or fumes.
Long sleeves can protect your skin from accidental splashes. Always confirm your protective gear fits properly for maximum safety. Wearing the right gear minimizes the risk of irritation or accidents, allowing you to focus on cleaning effectively and safely.
Clear Work Area
A clean, clutter-free work area is essential for safe and effective glass cleaning. Before you start, remove any objects around your car that could get in the way or be damaged.
Clear away tools, trash, and personal items from your driveway or garage. Make sure the surface around your vehicle is free of dirt, leaves, or debris that could fall onto the glass during cleaning.
This helps prevent dirt from scratching the glass or contaminating your cleaner. Position your car in a well-lit, stable space to give yourself good visibility and prevent accidents.
A tidy workspace helps you focus on the task, reduces the risk of slipping or knocking things over, and makes sure your cleaning process goes smoothly.
Check Weather Conditions
Checking the weather conditions before you start cleaning your car’s glass helps ensure a safe and effective process. If it’s sunny and hot, the cleaner can dry too quickly, leaving streaks or spots.
Windy days can blow dust or debris onto your wet glass, making cleaning less effective. Rain or high humidity can dilute the cleaner or cause streaks as the moisture evaporates.
Choose a day with mild temperatures, low wind, and no rain forecasted. Early mornings or late afternoons often have better conditions.
Avoid cleaning in direct sunlight to prevent your cleaner from drying too fast and leaving streaks. Proper timing helps keep your glass clean and streak-free, giving you a clearer view and safer driving.
Step-by-Step: Applying Ammonia-Free Glass Cleaner Effectively
Start by preparing your work area to keep dust and debris away from the glass. Spray the ammonia-free cleaner evenly onto the surface, making sure to cover all areas.
Then, use a clean cloth to wipe the glass and achieve clarity without streaks.
Prepare Your Cleaning Area
Before applying your ammonia-free glass cleaner, clear the area around your car’s windows to remove loose dirt, dust, or debris. Use a soft brush or cloth to sweep away particles that could scratch the glass during cleaning.
Make sure the surface is dry and free of cobwebs, leaves, or other debris that might interfere with a smooth cleaning process. Park your car in a shaded area to prevent the cleaner from drying too quickly or streaking in direct sunlight.
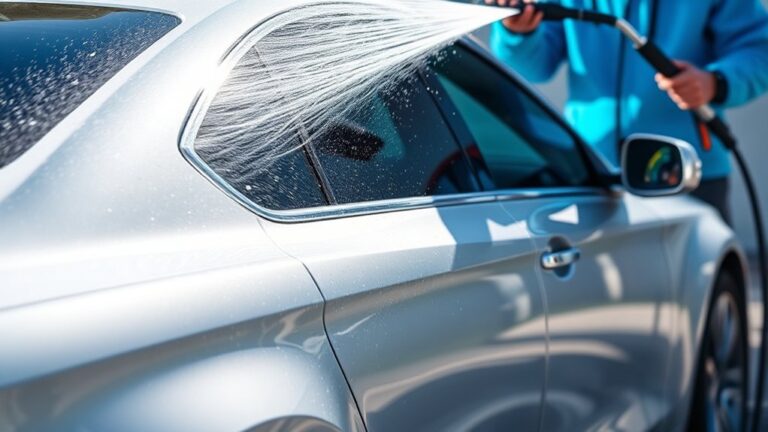
If the windows are especially dirty, consider rinsing them with water first to loosen stubborn grime. Taking these steps creates a clean, even surface for the best results and helps prevent scratches or streaks when you start cleaning.
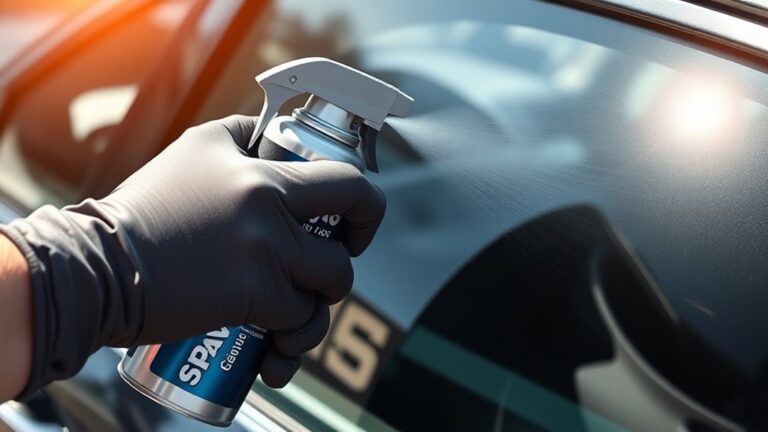
Apply Cleaner Properly
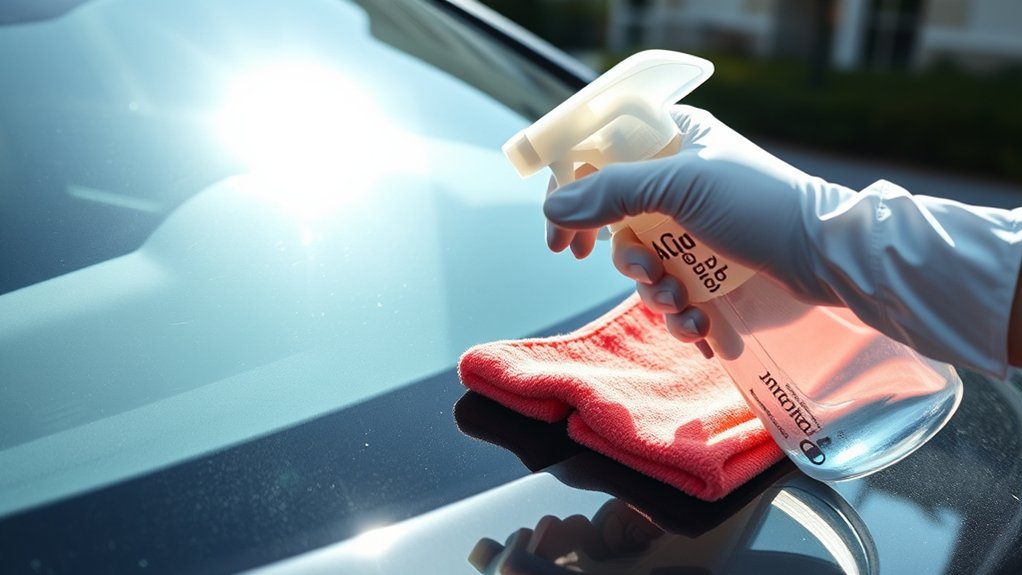
To apply your ammonia-free glass cleaner effectively, spray the solution directly onto the clean, dry windows, covering the entire surface in a light, even layer. Hold the spray bottle about six to eight inches from the glass to prevent excess application.
Be sure to target all areas, including the edges and corners, for uniform coverage. Avoid oversaturating the glass, as too much cleaner can lead to streaks or drips. If you notice any pooling or excess, use a clean cloth or paper towel to wipe it away.
Wipe for Clarity
Once you’ve spread the cleaner evenly across the glass, it’s time to wipe away any leftover residue for maximum clarity. Use a clean, soft microfiber cloth and gently wipe the surface in a circular motion.
Start from the top and work your way down, making sure to cover all areas evenly. Apply light pressure to lift dirt and streaks without scratching the glass.
If streaks show up, switch to a fresh section of the cloth and wipe again. For stubborn spots, dampen your cloth slightly and repeat the process.
Avoid using paper towels, as they can leave lint. Proper wiping results in a streak-free, crystal-clear finish that boosts visibility and your driving experience.
Tips to Avoid Streaks and Residue When Cleaning Windows
Achieving streak-free, residue-free windows is simple with a few easy techniques. First, try to clean your windows on a cloudy day or when the glass is cool. This helps prevent the cleaner from drying too quickly and leaving streaks.
Use a soft, lint-free microfiber cloth to avoid leaving fibers behind. Spray the cleaner lightly and evenly, but don’t oversaturate the glass, as too much liquid can cause streaks.
Work in small sections, wiping in a circular motion to get even coverage. Then, dry each section with a clean, dry cloth to prevent any residue.
Finally, avoid cleaning windows in direct sunlight. The heat speeds up evaporation, which makes streaks more likely. Cleaning in shaded, cool conditions is always best.
Common Mistakes to Watch Out for During Glass Cleaning
While following proper cleaning techniques helps prevent streaks, many people still make common mistakes that can damage their car’s glass or make it look worse. One mistake is using too much cleaner, which can cause streaks and leave residue behind.
Cleaning in direct sunlight is another common error. The cleaner dries too quickly, leaving spots and streaks. It’s best to clean when the glass is shaded or during cooler parts of the day.
Don’t forget to remove dirt or debris before wiping. If you skip this step, you might scratch the glass during cleaning. Also, using abrasive materials or rough cloths can scratch or damage the surface.
Applying too much pressure while wiping can cause streaks or even harm the glass. Be gentle and use light, consistent strokes. Finally, make sure to rinse or wipe off excess cleaner completely to avoid smudges that reduce visibility. Avoid these mistakes to keep your car’s glass clear and spotless.
Cleaning Different Types of Car Windows and Surfaces Safely
To clean different car windows and surfaces safely, it’s important to identify each surface correctly.
Use the right cleaning techniques for each material to avoid damage. Being cautious helps you keep your car looking its best without causing unnecessary harm.
Proper Surface Identification
Before applying glass cleaner, it’s important to identify the surface you’re working with because different materials need different cleaning methods. Knowing whether you’re cleaning glass, plastic, or tinted windows helps prevent damage.
For example, plastic surfaces might scratch or become cloudy if you use harsh chemicals. Tinted windows can also be sensitive to certain cleaning agents, so proper identification is key to choosing the right approach.
Check the manufacturer’s label or manual for cleaning recommendations. Look at the surface for signs of tint or plastic material to help you decide what to use.
It’s a good idea to test a small, hidden area first before applying the cleaner to the entire surface. Avoid using abrasive cloths on delicate surfaces to prevent scratches.
Use gentle, non-abrasive cleaners on plastic or tinted surfaces to keep them in good shape.
Suitable Cleaning Techniques
Different car windows and surfaces require specific cleaning techniques to ensure safety and prevent damage. For tinted windows, use a soft microfiber cloth and gentle wiping motions to avoid scratching or peeling the tint film.
When cleaning glass surfaces like the windshield or side windows, spray the ammonia-free cleaner directly onto the cloth, not the surface. This helps prevent overspray and streaks.
For plastic or acrylic surfaces, avoid abrasive scrubbers and use a light touch with a microfiber cloth. This prevents scratching and keeps the surface looking clear.
Always work in gentle circular motions, paying attention to edges and corners. Rinse or wipe away any residue thoroughly to avoid streaks or buildup.
Adjust your cleaning method based on the surface type to ensure safe, effective results.
Avoiding Surface Damage
Using the right cleaning techniques is essential to prevent surface damage when cleaning your car’s windows and surfaces. Different materials require specific care, so knowing what to avoid is key. Always test a small area first to check for reactions.
Use soft cloths or microfiber towels to prevent scratching. Avoid harsh scrubbing or abrasive tools that can scratch glass or paint. Be cautious around tinted windows or delicate surfaces, which may react poorly to certain cleaners.
Never spray cleaner directly onto the surface; instead, spray onto a cloth. Keep the cleaner away from rubber seals and plastic trims, as some chemicals can cause deterioration.
How to Maintain Clear Car Windows Between Deep Cleanings
Keeping your car windows clear between deep cleanings is key for safety and good visibility. Regularly wipe down your windows with a microfiber cloth to remove dust, dirt, and smudges.
Use a spray of ammonia-free glass cleaner for quick touch-ups, focusing on the edges and corners where grime tends to build up. Avoid harsh scrubbing, which can scratch the glass or damage the sealant.
Keep a small, portable cloth in your glove box for on-the-go cleaning, especially after rain or muddy conditions. Park in shaded areas when cleaning to prevent streaks caused by sun drying the cleaner too quickly.
Consistent maintenance prevents buildup, helping keep your windows clear and your view unobstructed without needing frequent deep cleans.
Troubleshooting: What to Do When Your Windows Don’t Shine
If your car windows aren’t shining as they should after cleaning, you might be dealing with streaks, residue, or mineral deposits that regular cleaning methods can’t remove.
Start by inspecting your cleaning technique. Sometimes, using too much cleaner or wiping in circles causes streaks. You might also have mineral deposits from hard water or stubborn residue from previous products.
Try these steps:
- Use a microfiber cloth for a streak-free finish
- Rinse the windows with distilled water before cleaning
- Apply a small amount of cleaner, then wipe with the grain
- Use a vinegar solution to remove mineral deposits
- Dry thoroughly with a clean, dry microfiber cloth
Final Tips for a Safe, Streak-Free Car Window Shine
Achieving a streak-free and safe shine on your car windows requires a few final, mindful steps. First, use a clean microfiber cloth to wipe away any remaining cleaner or smudges; this helps prevent streaks.
Always work in a shaded area to avoid the cleaner drying too quickly, which can cause streaks. Use a gentle, circular motion to clean and then follow up with a vertical or horizontal wipe to guarantee even coverage.
Work in shade, clean with gentle circular motions, then wipe vertically or horizontally for even, streak-free windows.
Avoid pressing too hard, as this can scratch the glass. For stubborn spots, apply a little more cleaner and let it sit for a moment before wiping.
Finally, inspect your windows from different angles to catch missed spots, and use a dry microfiber cloth for a polished, streak-free finish.
Frequently Asked Questions
Can Ammonia-Free Glass Cleaners Damage Tinted Car Windows?
No, ammonia-free glass cleaners generally won’t damage tinted car windows. They’re designed to be gentle and safe on tinted surfaces, unlike ammonia-based cleaners that can cause fading or peeling.
That said, always check the product label to make sure it’s suitable for tinted windows. When cleaning, spray the cleaner onto a soft cloth first and avoid direct contact with the tint to prevent any potential issues.
Are There Any Environmental Concerns When Using Ammonia-Free Glass Cleaners?
Imagine a gentle rain washing over a clean window. Ammonia-free glass cleaners are designed to be environmentally friendly, so they generally pose fewer concerns.
You won’t have to worry about harmful fumes or toxic runoff harming plants or wildlife. However, it’s still wise to check the label for biodegradable ingredients and proper disposal instructions.
Using these cleaners responsibly helps protect the environment while keeping your car spotless.
How Often Should I Clean My Car Windows With Ammonia-Free Cleaner?
You should clean your car windows with ammonia-free glass cleaner every two to four weeks, depending on how much dirt, dust, or smudges build up. Regular cleaning helps keep your windows clear and improves visibility.
If you notice streaks or grime, it’s a good idea to clean them sooner. Just be careful not to over-clean, as that can cause streaks or even damage to the glass.
Always follow the instructions on the product for the best results. Use a microfiber cloth for a streak-free shine and a clean look.
Is It Safe to Use Ammonia-Free Glass Cleaner on Heated or Frozen Windows?
It’s safe to use ammonia-free glass cleaner on heated or frozen windows, but timing is key.
Applying it when your windows are warm helps the cleaner evaporate quickly, which prevents streaks.
Avoid using it on frozen windows, as the cold can cause the cleaner to freeze or leave streaks.
Always wait until your windows are at a comfortable temperature—neither too hot nor frozen—for the best and safest results.
Can Ammonia-Free Glass Cleaners Be Used on Interior Glass Surfaces Safely?
Yes, you can safely use ammonia-free glass cleaners on interior glass surfaces. They’re designed to be gentle and won’t damage tinted windows or delicate interior materials.
When cleaning, spray the solution onto a soft microfiber cloth instead of directly on the glass. This helps prevent excess moisture from seeping into areas where it shouldn’t go.
Wipe the glass evenly, then buff it with a dry cloth for a streak-free shine. Always follow the instructions on the product for the best results.
Conclusion
By following these steps, you’ll keep your car’s windows crystal clear without risking damage. Using an ammonia-free glass cleaner is like tending to delicate flowers—gentle but effective.
Regular maintenance and proper technique will make your windows shine brighter than a diamond in the sun. Patience pays off, and a little effort now can prevent headaches later.
Stay vigilant, and your car will always look sharp. Using ammonia-free glass cleaner keeps your windows spotless, making every drive a smooth sail.