Step-by-Step Guide That Cleans Car Headlights
Are your car headlights looking dull or cloudy? You’re not alone—many drivers struggle with keeping their headlights clear and bright.
Luckily, with a few simple steps, you can restore their clarity and improve your visibility on the road.
To clean your car headlights, start by washing them with soap and water to remove dirt and debris.
Use painter’s tape around the edges to protect your paint.
Sand the cloudy surface with fine-grit sandpaper, starting with 800 grit, then move to finer grits like 2000 for a smooth finish.
Apply a plastic polish and sealant to protect your headlights.
Keep your headlights clear longer by following proper maintenance tips—more details are just ahead.
Key Takeaways
- Clean your headlights with soap and water first to get rid of dirt and debris. This makes the restoration process much easier.
- Next, protect the areas around the headlights with painter’s tape. This helps prevent scratches while you’re sanding.
- Start sanding the headlights gradually, using coarse grit and moving to finer grits like 800 to 2000. Take your time to get a smooth surface.
- After sanding, polish the headlights with a microfiber cloth and some headlight restoration compound. This will help restore clarity and shine.
- Finally, apply a UV sealant or clear coat to protect your headlights from future cloudiness and damage.
Why Do Car Headlights Turn Cloudy Over Time?
Over time, your car headlights turn cloudy because the protective UV coating on the plastic lens breaks down. This happens due to exposure to sunlight, pollution, and harsh weather.
UV rays from the sun cause chemical reactions that weaken this coating, making the plastic more vulnerable. Pollution, dirt, and road grime also build up on the surface, speeding up the deterioration.
UV rays weaken the coating, while dirt and grime accelerate headlight clouding and deterioration.
Harsh weather like rain, snow, and salt make things worse by causing oxidation and surface damage. As the coating wears away, the plastic becomes hazy and yellowed, reducing brightness and effectiveness.
This cloudiness isn’t just cosmetic; it can also be dangerous. It impairs your visibility during night driving or bad weather. Knowing why headlights turn cloudy highlights the importance of regular cleaning and maintenance.
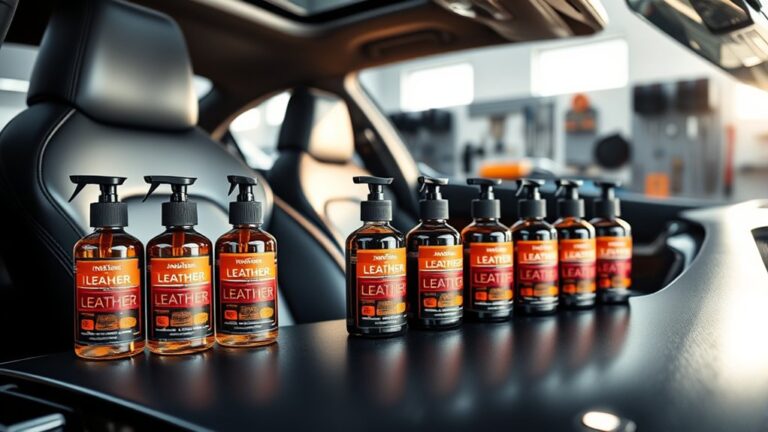
Tools and Supplies You Need for Headlight Restoration
To effectively restore your headlights, you’ll need a basic set of tools and supplies designed for cleaning and polishing plastic surfaces. Start with a microfiber cloth for gentle wiping and buffing.
You’ll also need a plastic polish or headlight restoration kit, which typically includes a cleaning solution, sanding pads, or polishing compounds. A soft sponge or applicator pad makes applying products easier.
For sanding, have fine-grit sandpaper (around 2000 grit) ready to smooth out the surface. Protect your surrounding areas with painter’s tape to avoid scratches.
Finally, a UV sealant or clear coat helps protect the headlights from future fogging. These tools and supplies form the foundation for a successful restoration and a clearer, brighter headlight.
Preparing Your Headlights Before Restoring Them
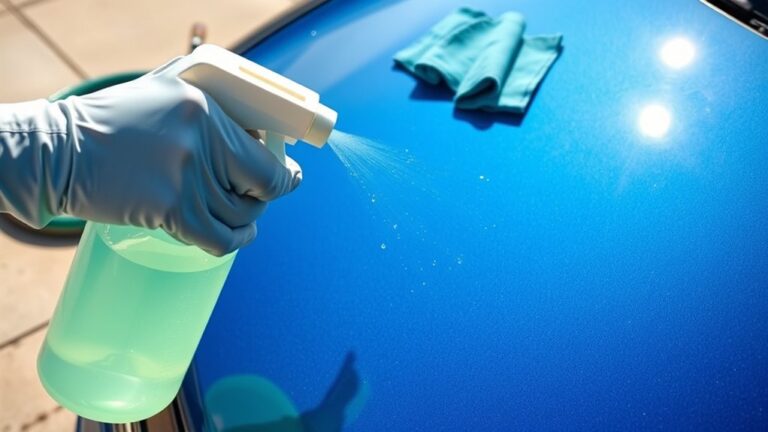
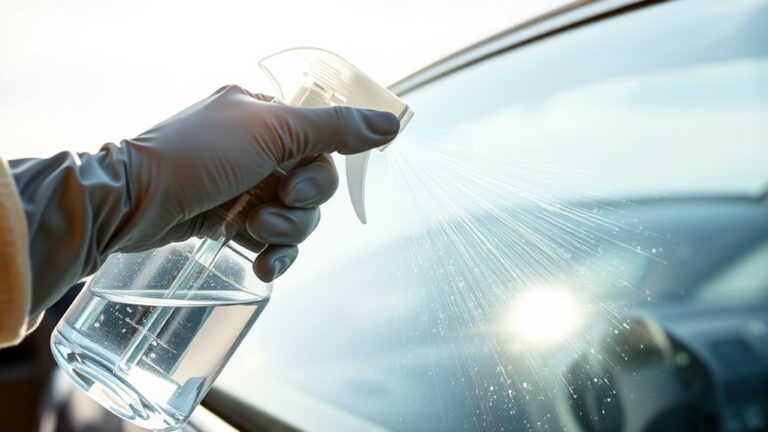
Before you start restoring your headlights, make sure to clean and dry the surface thoroughly. Removing dirt, grime, and loose debris helps ensure a smooth process and prevents scratches.
First, wash the headlights with soap and water to get rid of surface contaminants. Use a microfiber cloth to wipe away any remaining dust or residue.
Wash headlights with soap and water, then wipe away dust with a microfiber cloth.
Next, dry the surface completely with a clean, lint-free towel. Take a moment to inspect for stubborn dirt or film that might need extra cleaning or a gentle wipe.
Proper preparation creates a clean, dry surface, making your restoration products work better and giving you better results. Skipping this step can cause uneven polishing or leftover haze.
How to Sand Your Headlights for a Smooth Surface
To start sanding your headlights, gather your sanding supplies and make sure you have the right grit for the job.
Prepare the surface by cleaning it thoroughly so there’s no dirt or debris that could scratch the glass.
Then, apply even pressure as you sand with smooth, consistent strokes.
This approach helps you achieve a clear, even finish on your headlights.
Gather Necessary Sanding Supplies
Gathering the right sanding supplies is key to getting a smooth, even finish on your headlights. First, you’ll want different grit sandpapers to gradually smooth out the surface.
Next, get a sanding block or sponge to keep pressure even and make the job easier. Have some masking tape ready to protect areas around the headlight from scratches.
Also, prepare a clean cloth or sponge for rinsing and wiping the headlight during the process. Using the right supplies ensures effective sanding and helps prevent damage.
Start with a coarse grit, around 800, to remove oxidation. Then switch to finer grits like 1000-2000 for a polished, clear look.
Keep everything organized and within reach to make the process smoother. Having the proper supplies really makes a difference in achieving clear, smooth headlights.
Prepare the Headlight Surface
Start by thoroughly washing your headlights with soap and water to remove dirt, grime, and any loose debris. Dry them completely with a clean cloth.
Next, inspect the surface for any remaining residue or stubborn spots; if needed, wipe with a bit of rubbing alcohol to make sure it’s spotless. This step is essential because a clean, smooth surface helps the sandpaper work effectively.
Avoid touching the headlight with your fingers afterward, as oils can create uneven spots. Confirm the headlight is completely dry before moving on.
Proper preparation helps to achieve an even, smooth finish during sanding, reducing the risk of scratches or uneven patches. Properly prepared surfaces set the foundation for a clear, restored headlight.
Sand in Even Strokes
Begin sanding your headlights with even, gentle strokes, keeping the pressure consistent across the entire surface. This helps you get a smooth, uniform finish. To do this well, follow these steps:
- Start from one side and move steadily across the entire headlight.
- Use overlapping strokes to avoid uneven spots.
- As you go, switch to finer grit sandpaper for a smoother surface.
- Regularly rinse the headlight and your hand to remove debris and check your progress.
Keep a steady pace and avoid pressing too hard, which could damage the plastic. Consistency is key to preventing scratches or uneven surfaces. Take your time and focus on making your strokes even. This will help you achieve a professional-looking, clear result.
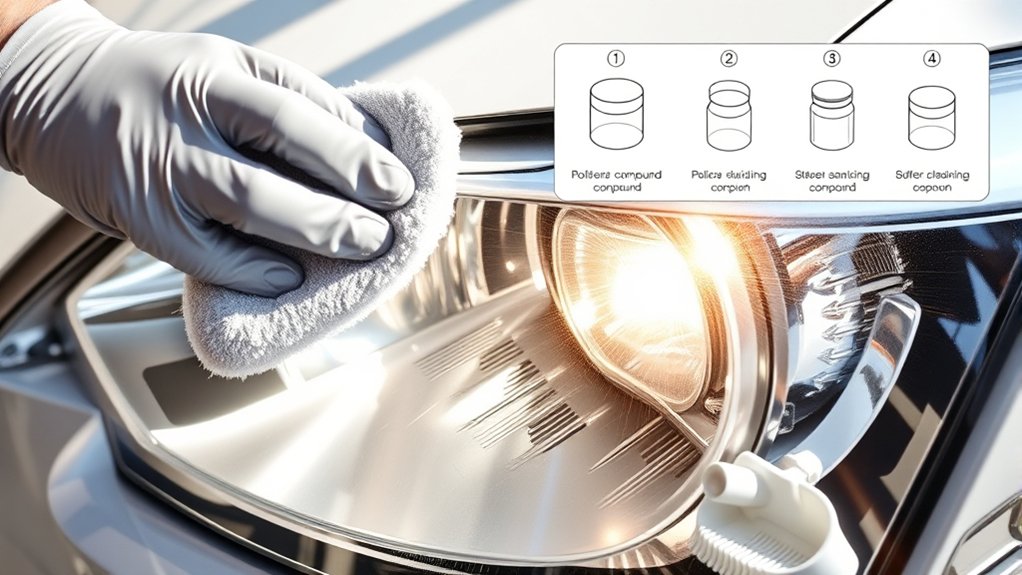
Applying Headlight Restoration Compound Effectively
To apply the headlight restoration compound effectively, start with thoroughly cleaned and dry headlights. This helps the compound stick well and prevents dirt from scratching the surface.
Use a clean microfiber cloth to wipe away any debris or residue. Then, apply a small amount of the compound onto a soft applicator or cloth.
Spread it evenly across the surface in circular motions, working on small sections for a consistent finish. Keep the compound moist but avoid over-saturating.
Apply gentle pressure while spreading to ensure proper coverage. Remember to stay organized with this quick reference:
| Step | Tip |
|---|---|
| 1 | Use a clean applicator for smooth application |
| 2 | Work in small sections for even coverage |
| 3 | Apply gentle pressure during spreading |
| 4 | Keep the compound moist for best results |
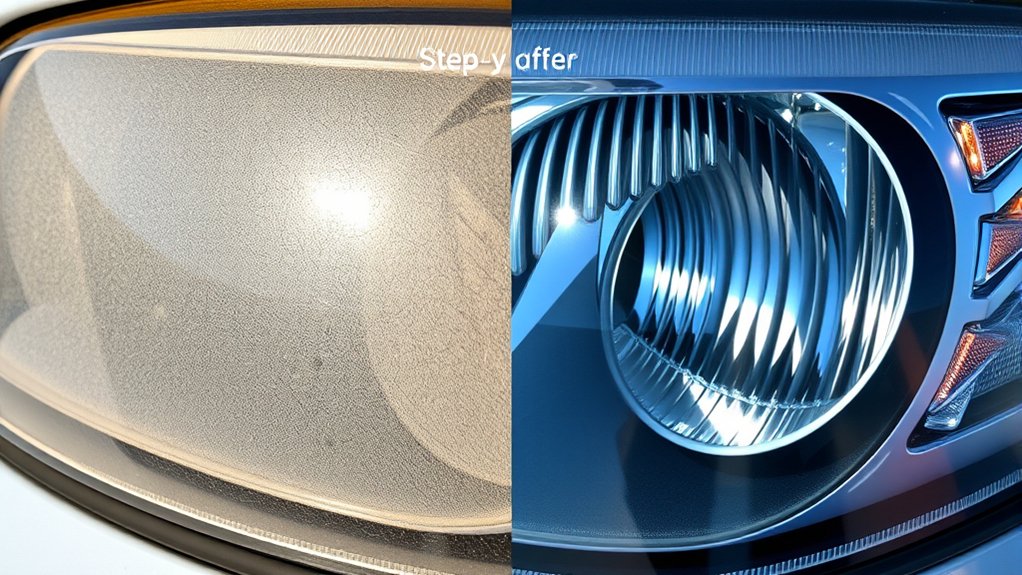
Polishing and Clearing Your Headlights for Maximum Brightness
To get the brightest headlights, you need to use proper polishing techniques that smooth out the surface and get rid of any haze.
Once you’ve polished them, applying a clear coat helps protect your headlights from damage and keeps them shining bright.
Make sure to focus on even application and thorough coverage to get the best results.
Proper Polishing Techniques
Achieving maximum brightness from your headlights requires careful polishing and clearing. To do this effectively, follow these steps:
- Use a clean microfiber cloth and apply a small amount of polishing compound to the headlight surface.
- Work in circular motions, applying consistent pressure to evenly remove surface oxidation.
- Keep the headlight moist by occasionally spraying water or a polishing lubricant to prevent scratching.
- Regularly check your progress, making sure the surface becomes clearer and less foggy.
Applying Clear Coat
Once you’ve polished your headlights and removed the oxidation, applying a clear coat is the next step to protect the surface and improve brightness. Start by thoroughly cleaning the area to remove any dust or debris.
Use a spray or brush to evenly apply a high-quality clear coat designed for automotive use. Work in smooth, overlapping strokes to prevent drips or uneven coverage.
Allow the clear coat to dry fully, following the manufacturer’s recommended drying time. For added durability, consider applying a second layer once the first has set.
This coating seals the polish and shields the headlights from UV rays, dirt, and moisture, keeping them brighter longer. Proper application guarantees a professional finish and maximizes the longevity of your headlights’ clarity.
Top Tips to Prevent Headlight Cloudiness in the Future
Preventing headlight cloudiness starts with regular maintenance and mindful habits. To keep your headlights clear, try these top tips:
Keeping headlights clear starts with regular care and smart habits to prevent cloudiness over time.
- Wash your headlights regularly with soap and water to remove dirt and grime.
- Use a protective sealant or UV-resistant wax every few months to shield from sun damage.
- Park your car in shaded spots or a garage to reduce sun exposure.
- Steer clear of harsh chemicals or abrasive materials that can scratch or weaken the plastic.
How Long Does a Headlight Restoration Last?
The lifespan of your headlight restoration depends on several factors, including the quality of the repair and your maintenance routine. Proper care can extend its durability, but the environment you drive in also plays a role.
Understanding these points helps you get the most out of your headlight restoration. Keeping your headlights clean and protected can make a big difference in how long the results last.
Durability Factors Explained
The longevity of a headlight restoration mainly depends on a few key factors that determine how long the results will last. First, your driving environment matters—a lot. Exposure to harsh weather, UV rays, and road debris can speed up deterioration.
Next, the quality of the restoration materials you use is important. Higher-quality sealants and UV protectants tend to last longer and provide better protection.
Your cleaning habits also play a role. Regular washing helps remove dirt and corrosive substances that can damage the headlights over time.
How well you apply the restoration process makes a difference too. Proper surface preparation and evenly applying the coating create a more durable finish that lasts longer.
To get the most out of your restoration, invest in good products, protect your headlights from the elements, and keep them clean. These steps will help extend the time between restorations and keep your headlights clear longer.
Maintenance Tips for Longevity
To keep your headlights looking good for a long time, regular maintenance is key. Clean them every few months with a gentle polish to remove dirt and oxidation buildup.
Applying a UV sealant after cleaning gives extra protection against future damage. Always check for cracks or chips and fix them quickly to prevent them from getting worse.
Parking in shaded areas helps reduce UV exposure, which slows down yellowing. Keep your headlights dry and avoid harsh chemicals that can wear down the surface over time.
Here’s a quick guide:
| Tip | Action | Frequency |
|---|---|---|
| Clean and polish | Use a headlight cleaner | Every 3-4 months |
| UV protection | Apply a sealant | After cleaning |
| Inspect for damage | Look for cracks | Monthly |
| Parking habits | Seek shade | Always |
| Avoid harsh chemicals | Use gentle cleaners | As needed |
Regular care helps your headlights stay clear and bright longer.
Expected Restoration Lifespan
A properly restored headlight typically lasts between one to three years before needing another treatment. Several factors influence its lifespan:
- Climate Conditions: Exposure to harsh weather or UV rays speeds up the clear coat’s deterioration.
- Driving Habits: Driving often at night or in bright sunlight can shorten how long the restoration lasts.
- Quality of Products: Using high-quality sealants and compounds usually means longer-lasting results.
- Maintenance Routine: Regular cleaning and applying protective waxes help keep the headlights clear.
To make your headlights last longer, avoid abrasive cleaners, park in shaded areas, and reapply a UV sealant every year. Proper care helps your headlights stay clear and functional for as long as possible.
When and How to Repeat Headlight Restoration
Knowing when to repeat headlight restoration depends on how quickly your headlights become cloudy or yellowed again. If they start to look hazy or discolored within a year, it’s time for another round.
Regular exposure to sun, dirt, and road grime speeds up fogging, so keep an eye on their clarity. You should also consider repeating the process if you notice a significant decrease in brightness or visibility while driving at night.
When you decide to redo the restoration, clean the headlights thoroughly first. Then, lightly sand the surface if needed, apply a fresh coat of polish or sealant, and buff until clear.
Doing this every few years helps keep them bright, safe, and looking good.
Comparing DIY Headlight Cleaning Methods: Which Works Best?
Have you ever wondered which DIY headlight cleaning method actually works best? It’s worth comparing some popular options.
Toothpaste is easy to find and mildly abrasive. It removes surface cloudiness but might need to be reapplied often.
Baking soda and vinegar make a natural combo that tackles grime and oxidation. They give a gentle scrub with noticeable improvements.
Automotive polishes are made specifically for headlights. They restore clarity efficiently but can be a bit more expensive.
Sanding kits use different grades of sandpaper. They provide a deep clean for tough oxidation but need careful application to prevent damage.
Each method varies in effectiveness, effort, and how long the results last. Your choice depends on how cloudy your headlights are and your comfort with DIY projects.
When Should You Seek Professional Headlight Restoration Services?
While DIY methods can significantly improve cloudy headlights, sometimes it’s best to call in the pros. If your headlights stay foggy even after trying to clean them multiple times, it’s probably time to seek professional help.
Severe oxidation, deep scratches, or cracks can’t be fully fixed with home kits. If you notice a big drop in light output or uneven fogging, professionals have the right tools and techniques to restore clarity safely.
If you’re uncomfortable using chemicals or sanding equipment, hiring experts ensures the job is done correctly without risking more damage. Plus, if your DIY efforts haven’t worked, professional restoration can save you time, money, and frustration in the long run.
Frequently Asked Questions
Can Headlight Restoration Improve Visibility During Night Driving?
Yes, restoring your headlights can really improve visibility during night driving. When they get cloudy or yellowed, their light output drops, making it harder to see.
By restoring them, you clear up the lens surface, letting more light pass through. This results in brighter, clearer illumination on the road.
It makes night driving safer, more comfortable, and less stressful.
Are There Any Safety Precautions to Consider During Headlight Cleaning?
Absolutely, you should always prioritize precautions during headlight cleaning. Protect your eyes with goggles, and wear gloves to prevent irritation from chemicals.
Work in a well-ventilated area to avoid inhaling fumes. Be careful with abrasive materials that might scratch the lens.
Following these safety steps guarantees your eyes stay protected, your hands stay safe, and your headlights shine brightly, boosting visibility and your vehicle’s overall safety during night drives.
How Much Does Professional Headlight Restoration Typically Cost?
Professional headlight restoration usually costs between $75 and $150 per headlight, depending on your location and how bad the fogging or yellowing is. Some auto shops include both headlights in the price, while others charge for each one separately.
It’s definitely worth it if your headlights are cloudy because it improves visibility and safety. Just make sure to get a quote first and compare prices at different places to find the best deal.
Will Headlight Restoration Damage the Original Headlight Coating?
Restoring your headlights usually won’t damage the original coating if you follow the right steps. Professional restorers use gentle abrasives and sealants that are meant to protect the lens surface.
If you do it carefully, restoration can actually make your headlights last longer and improve visibility. But if you use aggressive tools or harsh chemicals, you could strip or damage the coating.
Always choose certified professionals to make sure your headlights stay protected and in good shape.
Is It Safe to Use Household Products for Headlight Cleaning?
Using household products to clean headlights can be risky. Some items, like ammonia or bleach, might damage the plastic or cause discoloration.
Always check if the product is safe for plastics before using it on your headlights. Instead, go for gentle cleaners like car-specific polish or a mixture of baking soda and water.
This way, you can clean effectively without risking damage to your headlights’ coating or clarity.
Conclusion
Remember, restoring your headlights is like polishing a mirror. When done right, it reflects clarity and safety on your journey.
With the right tools and a bit of patience, you can turn cloudy, dull headlights into shining lights that guide your way.
Don’t let time’s haze dim your drive. Instead, clear the way forward with a simple, effective restoration.
Your car’s headlights will glow like stars, lighting up your path ahead. Restoring headlights is key to safer driving and a brighter look.